Classroom Setup Tips
for High School Special Education Teachers

The beginning of the school year is exciting, but it can also feel overwhelming, especially when you’re teaching special education in high school.
You’re not just arranging desks and bulletin boards. You’re expected to create an environment that meets different academic, behavioral, sensory, and life skills needs—all in one room. And often, you’re doing this in a regular-sized classroom!
I’ve been there. And I want to show you that even with limited space and a long to-do list, it’s absolutely possible to set up a high school SPED classroom that works for your students and for you.
Here are some tips to help you get started!
1. Get to Know Your Students First

Before you even touch a desk, start by understanding your students’ needs. Review their Individualized Education Programs (IEPs) to find out their learning styles, behavior plans, sensory needs, accommodations, and goals. If you can, talk to last year’s teachers and reach out to their families.
When you know your students, you can better decide what you need in your classroom.
For example, you might find out that one student uses a mobility aid, and another requires quick access to a calm-down area.
Knowing this ahead of time helps you plan your layout with intention.
2. Set Up According to Your Schedule

The best classroom setup supports your actual routines. When you know when and how you’ll run small groups, whole group instruction, movement breaks, and job skills tasks, you can start setting up your area intentionally.
If you try to arrange your classroom before mapping out your day, you might forget to leave room for some activities. So, once you’ve figured out your IEP goals and groupings, work on your daily schedule.
If you use your board or screen for morning meetings, make sure student seating flows toward the front. If your afternoons involve independent work or life skills stations, set those up in quiet zones of the room.
3. Make Space for Different Activities

High school SPED Classrooms often serve as a homeroom, resource room, life skills room, and social-emotional hub all in one.
Decide what kinds of areas you’ll need and clearly define their zones. These don’t have to be big areas. A simple shelf, rug, or labeled table can visually separate zones. Even in a regular-sized classroom, this is doable with some planning.
Examples of areas you can set up:
- Independent work center with task boxes or folder work
- Collaborative area where students can work together
- Teacher center and staff zone
- Space for sensory breaks
- Life skills corner for cooking, cleaning, or laundry
- Tech station for iPad or gadget use
Separate spaces reduce distractions, reinforce routines, and even help your paras know where to support students during transitions.
4. Place Furniture with a Purpose in Mind

When you start moving shelves, desks, and tables around, it’s easy to fall into the trap of just trying to make everything fit. But in a special education classroom, especially in high school, where space may be limited, every piece of furniture should serve a clear purpose.
For example, you can use shelves as dividers to have clearly defined areas. You can also design multi-use areas by placing furniture back-to-back, like a table that can be used for morning meetings and also later for small group instruction.
Another tip: place your teacher’s desk intentionally. You don’t need it at the front unless that’s where you do most of your instruction. You can place it near the screen to easily access your computer while projecting, or near the classroom entrance so you can see who’s coming in and out.
5. Play with Layouts Before Moving Furniture
We’ve all been there—spending hours pushing desks around only to end up back at square one. Save yourself the sweat and map out different setups on paper first.
Ask yourself:
- Can students move around easily?
- What setup limits distractions?
- Do some areas feel crowded or hard to supervise?
And remember, the first layout doesn’t have to be final. Try different desk setups like clusters, rows, U-shapes, or individual desks if there’s enough space.
6. Organize Materials in a Way That Makes Sense for Teens

An organized classroom doesn’t have to be Pinterest-perfect. It just has to make sense to your students.
Keep things simple and accessible by grouping materials by subject or use. Store daily supplies like scissors, pencils, and calculators in easy-to-reach places so your students can access them independently.
Additionally, consider using color-coded bins. Assign specific colors to different subjects or types of activities (red for math, blue for reading, etc.) and label everything clearly so your students and staff always know where things go.
Using transparent storage containers is also helpful, so everyone can easily see what’s inside without having to open every box.
A good organization system saves time, reduces anxiety, and teaches students to take responsibility for their materials.
7. Offer Flexible Seating Options Within Reason
Teenagers with disabilities appreciate having choices, and offering flexible seating options can be one of them. It helps them be more comfortable and even helps them learn better.
However, too many options or unclear rules can lead to chaos. So make sure to still have structure and boundaries.
Try to mix traditional desks with options like:
- Standing desks
- Wiggle stools
- Floor cushions
Even one or two alternative seats can make a big difference. Just teach students when and how to use each type of seat. You can use visual reminders like “sit and fidget here,” or post a seating choice menu.
And always keep walkways clear—you don’t want seating to get in the way of safety or classroom flow.
8. Think About What Goes in Front of the Classroom

The front of the room is your most important wall space because students look at this space the most. Use it intentionally!
What do you want your students to remember and reference often? You can put class schedules, daily objectives, or morning meeting visuals beside the board.
If your teacher’s desk is bulky or blocks your view of students, try moving it to the back or side instead.
Lastly, remember to avoid over-decorating this space. Keep it functional and calm, not overstimulating.
9. Create a Calm and Positive Environment

Students do better in a space that feels safe and predictable. This is especially important for students with trauma histories, emotional needs, or sensory challenges.
Options to Try:
- Lamps (or light filters over fluorescent lights)
- Rugs, curtains, and soft seating
- Calm corner with reduced sensory input
When you decorate, keep things simple so it doesn’t overstimulate your students. Avoid overly cluttered bulletin boards or walls, and be intentional with bright colors.
Since every student has different needs, it will be a balance. But in general, keeping clutter (and decorations) to a minimum will be beneficial for everyone.
10. Decorate Last
Speaking of decorations, I know it’s exciting to start with the fun stuff like posters and bulletin boards. But before you decorate, make sure your classroom is functional.
Once everything else is in place—zones, desks, storage, visuals—then you can decorate. But, make sure not to go overboard!
A well-placed bulletin board, some plants, or student-made art can make your space feel inviting without adding a distraction. Choose a color scheme that’s soothing and easy on the eyes.
Decor should support the function of your room, not compete with it.
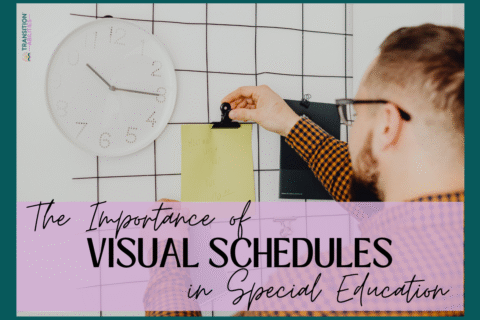
11. Use Visuals to Keep Things Running Smoothly
Visuals are your best friend in a special education classroom. They encourage independence, reduce anxiety, and support memory processing.
You can post visual aids around the classroom or use them individually with your students.
Some helpful visuals to use:
- A visual schedule posted in the front of the room
- Task checklists for multistep activities like job routines or hygiene tasks
- Labelled bins for supplies, using words and images
- Posters of classroom rules and expectations in simple language and visuals

Make Your Space Work for You!
Your classroom doesn’t need to be perfect. It needs to work. Setting up a high school SPED classroom is all about intention—every area, every shelf, every visual should serve a purpose.
Focus on what matters most: meeting your students’ needs, creating clear routines, and building a space where learning can happen without chaos. You got this!
Looking for what to teach during the first few weeks of school?
Get the FREE Back to School Guide for High School and Transition Special Education teachers – here!