Creating a NEURODIVERSITY AFFIRMING Classroom
(High School Special Ed)
If you’re wondering how to set up your transition or high school (self-contained) special education classroom, read on for tips, pictures & ideas!
Whether you’re starting from a blank slate, or are redecorating an older space filled with the last teacher’s belongings, I’ve got you!
I’ve taught my self-contained, transition class in a variety of different spaces, and each time we moved, it meant I had a chance to set up a new space that would better fit the needs of my students. It’s fun yet overwhelming to set up a new space. I get it!
After 15 years in the field, I’ve learned that I also need to keep in mind my own needs as a neurodivergent individual. Whether or not you have strong sensory needs yourself, here are some tips I’ve grown to live by over the years!
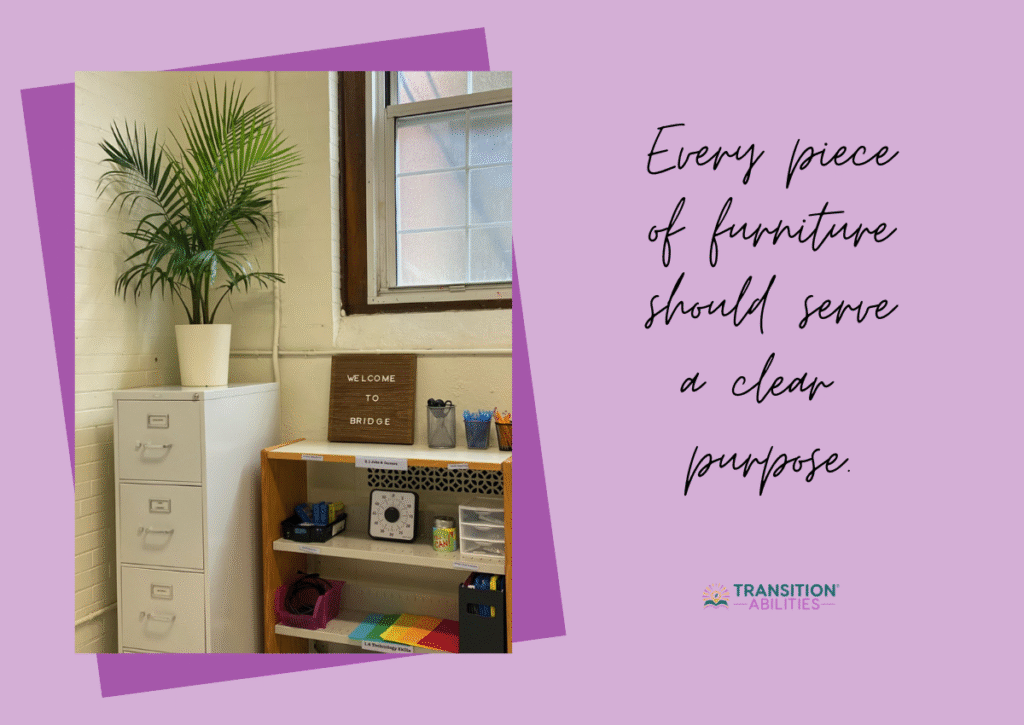
#1 Keep it Functional
I know, I know. You want to buy EVERYTHING you need for your classroom before school starts, so that you’re totally prepared. . . but the problem with this, is that you likely have not met all your students yet. You may not even know how many students you have, how many support staff, or even what your classroom looks like.
For these reasons, do your best to WAIT before spending your precious money on anything that may be pretty, but not necessarily functional. While it’s okay to decorate a little bit, you don’t want to create visual clutter that doesn’t serve a purpose! Settle into your new space with your students, and then decide what else you may need.
So how can you start to prepare? The #1 thing to keep in mind is FUNCTION MATTERS! Everything you hang up in your room should be done purposefully & intentionally, to support the students (and staff) in your room.
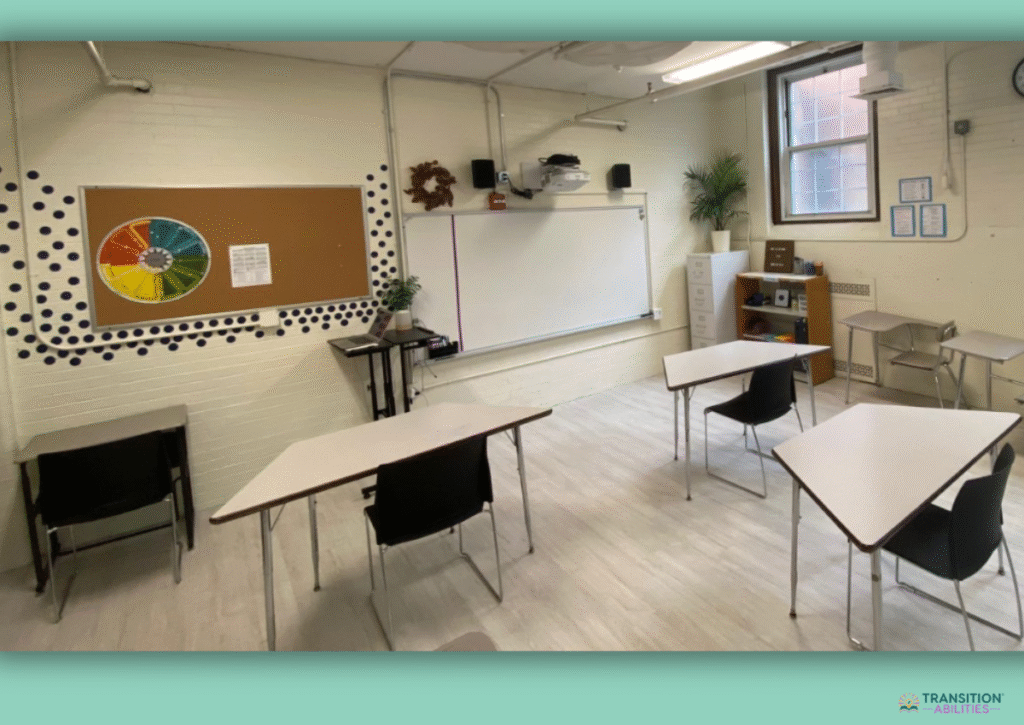
That doesn’t mean you can’t make your space visually appealing, if you want to. In this particular, very stark white, basement classroom, I used pops of color and plants to soften up the room. However, notice that I don’t cover every inch of wall space. I’ve had other classrooms with windows looking out at trees, where this type of decorating wouldn’t feel as necessary.
In general, functional items SERVE A PURPOSE and assist with the learning and teaching happening each day.
These community safety area visuals (above) and the morning meeting visuals (below) are examples . . . I often hang these or project them on the board.
As long as you have functionality in mind, you are on the right track. Set up your room so that your students can be as independent as possible, and so you can do less talking (and more pointing). Visual cues will speed up your students’ ability to learn and follow the routines, with the highest level of independence. If you need to give a verbal prompt, try something like, “What does your schedule say?” or “How can you find that out on your own?”
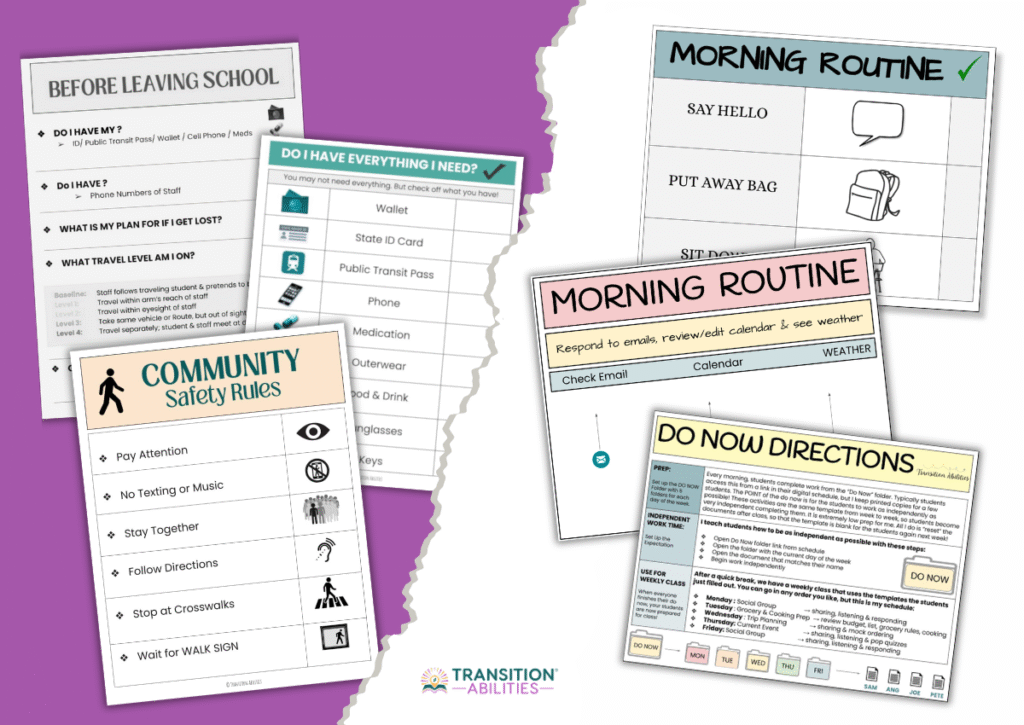
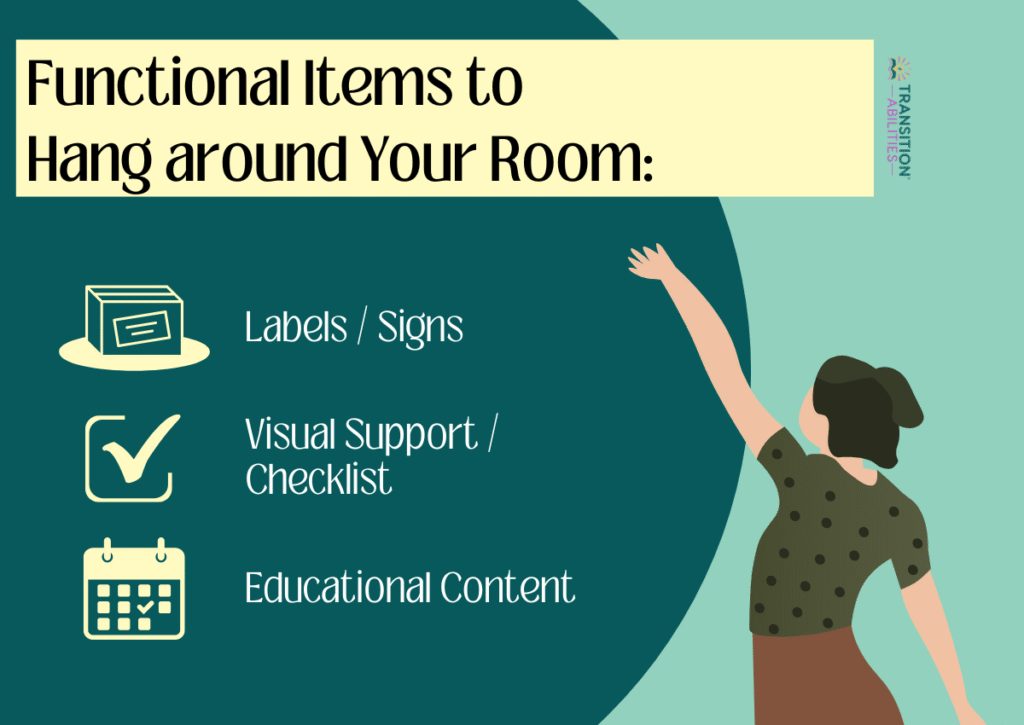
Here are some more examples of functional items to hang around your room!
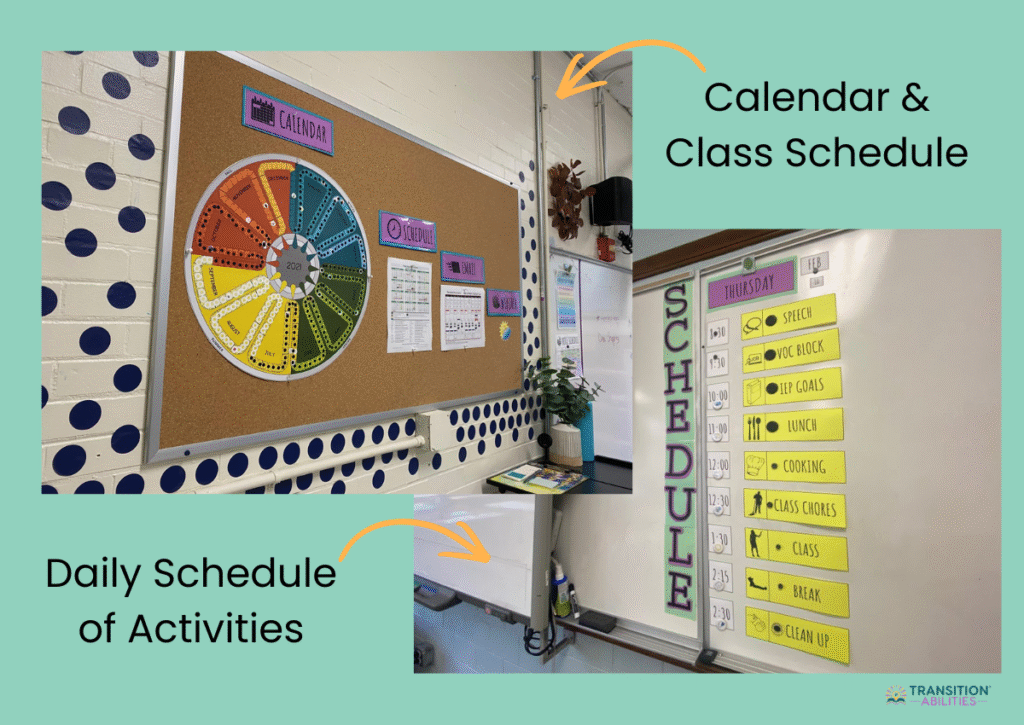
Of course, depending on the level of your students, you may need to use more picture-supported labels, first-then schedules, or another system that meets your students’ needs. This particular bulletin board is from a class I had with all readers.
If you’d like a FREE picture-supported visual schedule to get you started, you can get it by clicking the button below!
#2 Make it Professional
At the start of each school year, I always remind students that our classroom mimics a work environment. I expect them to present themselves professionally, so I try to make the classroom more “office” like and less like an elementary classroom. Offices often have job related expectations, framed artwork, house plants, schedules, calendars, and work-related tools are organized and labeled.
Click on the picture below if you want the link to the VOCATIONAL SUPPORTS WALL.

It’s also important to keep everything AGE RESPECTFUL. These students are in high school, or even beyond, and it’s possible to use visual supports along with text without it looking like an elementary classroom. I like to find images on google search, shrink images to be similar sizes, and sometimes I edit the color so the image isn’t distracting. If you need help making visual supports, I made directions for how to make your own visuals and schedules!
Lastly, ACCOMMODATIONS matter in a “workplace.” I encourage students to speak up for their own accommodations (like they would at a job). I might prompt . . . how do you feel about these circle sticker decorations? Do they distract you or make you happy? It’s important to build the space with your current student’s needs in mind, and to accommodate everyone in the room (staff, too!). What works for you one year might not work the next!
#3 Insist it is Sensory Friendly
Last, but NOT LEAST, you absolutely need to set up your space so that it sensory friendly. Your classroom should be a safe space for all students.
That means it should have enough room for students to safely move around, there should be decreased stimuli/clutter in the room, and everything should have a “home.” Though this can be a bit of work & planning to get set up, I PROMISE it is worth the effort!
KEEPING ORGANIZED
Start by making separate “areas” of the classroom. For example, one wall can have student schedules, the back right is for office supplies, laundry is in another corner, and frequently used student materials (like task cards or binders) are grouped together.
When each part of the classroom is clearly it’s own “space,” students and staff will have an easier time finding what they need (and then keeping it organized).

VISUAL STIMULI
Stick to a FEW colors, fonts, and cohesive looking visual supports.
Store extra materials in opaque bins or inside cabinets, so they are not in view. If that’s not possible, then keep the open shelving to the side or back of the room, so they don’t distract students at their desks. Too many clear bins and clutter on shelves can be very overstimulating visually.
On that note, do not cover every inch of wall space you have available! If you cram every visual, poster, and decoration onto your walls, it will be impossible for students to actually access the material. Less is more!
Also, keep in mind lighting! Whenever possible, use window light, lamps, dimmable lights, and non-fluorescent overhead lighting. Fluorescent lighting can be physically painful for some students, due to both the brightness of the light and the humming noise. A good option if you don’t have windows, is to include lamps, fairy lights or other hanging lights with “warm” tones.
AUDITORY & OLFACTORY STIMULI
While we’re talking about sensory needs, it’s also important to keep extraneous sounds and smells at a minimum. While it’s not always possible to control what is already built into the room you are in, start by focusing on what YOU bring into the classroom environment.
Ditch anything scented in the classroom, like dryer sheets & detergents, scented sprays . . . even staff perfume/colognes should not be allowed. Only buy unscented products, with the exception of any sensory tools you use for students who are sensory seekers.
Sounds are a little trickier. Sometimes, we are in a classroom with a loud overhead fan sound, humming lights, or a loud classroom next door. Sometimes our own students are an auditory distraction to our other students.
Provide access to headphones and a quiet space for everyone to access. And teach students how to advocate for their own sensory needs! This is an important life skill. I have a free video and social story you can use, too.
ACCESSIBILITY
You will also need to keep in mind how to make your room accessible for all your students. Do you have a student in a wheelchair? Can they navigate around the room to get everything they need? Do you have a student who uses another mobility aid to walk short distances? Maybe they need to have the seat closest to the classroom door.
What about a student who is very easily distracted? Seat them at the front of the room, or use a desktop privacy divider. A student who uses a swing, weighted vest, beanbag, or fidgets to decompress? Students with visual or auditory impairments? Obviously, the list goes on!
When in doubt, consult the rest of the IEP team to make sure your space is set up to accommodate each of your students!
I hope that these tips help you as you set up your classroom! If you’d like to see a video walk-through tour of one of my favorite spaces I’ve taught in, click one of the links below.